Kitchen Demolition: How to Do It Efficiently and Safely
Renovating your kitchen is an exciting project, but before you can bring in new cabinetry, countertops, and flooring, there’s one crucial step: demolition. A successful kitchen demolition requires careful planning, the right tools, and a methodical approach to ensure that the process goes smoothly, efficiently, and – most importantly – safely. This article will guide you through the essential steps of kitchen demolition, from preparation to execution, so that you can get your kitchen remodel underway without any major hurdles.
The Importance of Planning Your Demolition
Before you start tearing down walls and pulling up tiles, planning your demolition is essential. Taking the time to carefully assess your kitchen and determine what needs to be demolished will help you avoid mistakes that could delay the project. It’s not just about removing the old stuff, it’s about understanding what can stay and what needs to go. Here’s how to approach it:
- Evaluate what you want to keep: Some items, like plumbing and electrical systems, might not need to be removed. These can often be reused in your new kitchen design, saving time and money in the long run.
- Survey the kitchen layout: Understand how your kitchen is currently configured and which walls, counters, and fixtures are in your way.
- Assess potential hazards: Identifying hazardous materials like lead paint or asbestos before you begin demolition will save you from harmful exposure. Don’t hesitate to consult a professional if you suspect these materials are present.
Gathering the Right Tools for the Job
Having the proper tools for kitchen demolition will help make the process easier and quicker. Inadequate tools can lead to unnecessary frustration and delays. Here’s a list of tools you’ll likely need:
- Safety gear: Safety goggles, a dust mask or respirator, gloves, and steel-toed boots. These are your first line of defense when it comes to avoiding injury.
- Crowbar or pry bar: Essential for removing countertops, cabinets, and flooring.
- Hammer: To help dislodge stubborn nails and nails from boards and other fixtures.
- Utility knife: Perfect for cutting through drywall, vinyl flooring, or adhesive.
- Screwdriver or power drill: You’ll need these to unscrew fasteners that hold cabinets, shelves, or other built-in items.
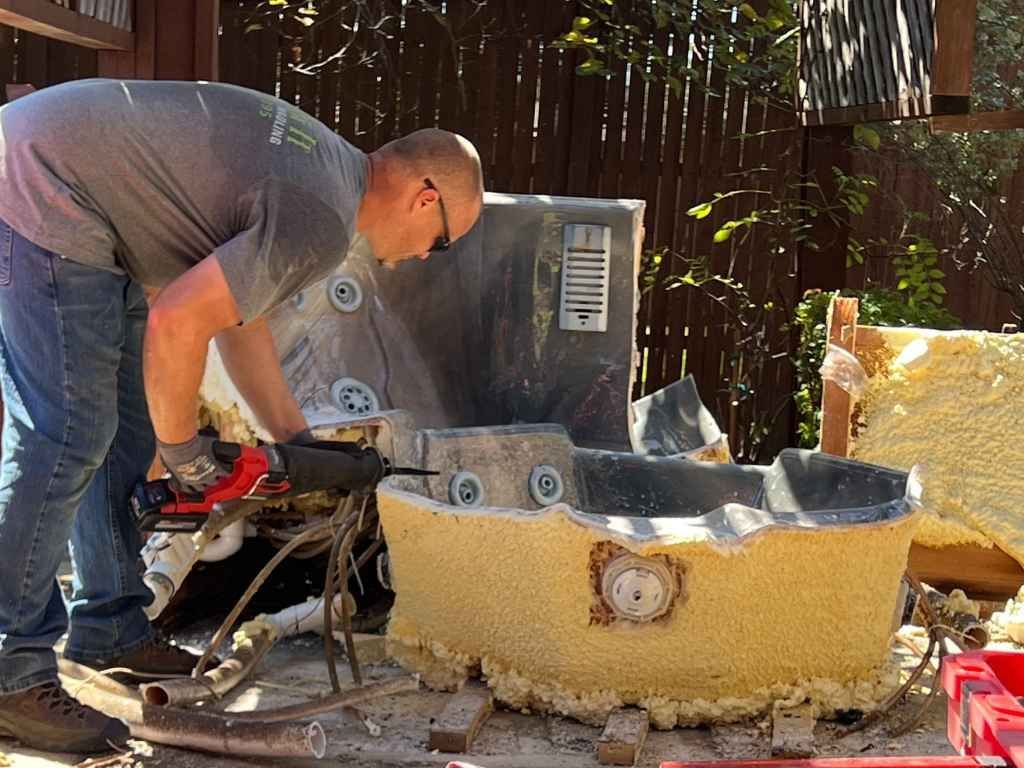
- Reciprocating saw (Sawzall): If you’re dealing with plumbing pipes or other stubborn materials, a reciprocating saw can help get the job done quickly.
- Pliers: Helpful for pulling out nails or bolts that might be tricky to remove.
- Heavy-duty trash bags or a dumpster: Demolition results in a lot of debris, so you’ll need somewhere to put it. A large dumpster or an efficient waste management system is necessary.
Having the right gear will not only make the job smoother but also prevent accidents. If you’re unsure about which tools to use, don’t hesitate to contact a professional demolition service for guidance.
Step-by-Step Process for Kitchen Demolition
Now that you’ve planned the demolition and gathered the necessary tools, it’s time to get to work. Follow these steps to complete your kitchen demolition safely and efficiently.
Remove the Fixtures and Appliances
Start by removing all appliances, such as your stove, fridge, dishwasher, and microwave. Be sure to turn off any gas lines, water supply, and electrical circuits before disconnecting these items. It’s also helpful to take pictures of how everything is set up so that when it’s time to install new appliances, you have a reference.
Next, tackle any smaller fixtures, like light fittings or sink faucets. Carefully unscrew and set these aside for reuse or disposal, depending on their condition. It’s important to remember that while demolition may involve the removal of items, it doesn’t mean everything goes straight to the landfill. If you’re in a position to donate or recycle items, take that route instead of just tossing everything.
Tear Down the Cabinets
Removing the cabinets is one of the most significant tasks in kitchen demolition. Start by emptying them out, ensuring that all dishes, glassware, and utensils are safely stored elsewhere. If you plan to replace your cabinets, this will be your chance to remove them. Use a screwdriver to unscrew the cabinet doors and hardware. If your cabinets are mounted on the wall, use a pry bar to carefully remove them from their mounts.
This is a good time to inspect the wall behind your cabinets for damage or mold. If you’re looking to make repairs or upgrades, you’ll need access to this area anyway. Keep in mind that some cabinets may still have old nails or screws embedded into the walls, which can require extra effort to remove.
Pull Up Flooring and Remove Countertops
Once the cabinets are out, it’s time to move on to the flooring. Depending on the type of flooring you have, it may be as easy as pulling up vinyl or tile with a crowbar. If your floor is glued down, you might need a scraper to loosen the adhesive. This is another part of the demolition process where you’ll need to be careful to avoid damaging the subfloor, as that could add unnecessary repair work down the line.
Removing countertops comes next. If your counters are made of laminate or wood, they’re relatively easy to remove with a crowbar and a hammer. However, if you have granite or marble countertops, these are much heavier and require extra caution. A reciprocating saw can be a lifesaver when cutting through stubborn materials. Be aware that some countertops are connected to plumbing, so remember to disconnect the water supply to your sink before removal.
Remove the Walls and Ceiling Fixtures
Once the heavy items are cleared, the next phase is the walls. If you're knocking down drywall or removing a portion of the wall, use a utility knife to score the edges. You’ll need to take extra care when removing drywall near electrical wires or plumbing, as these can cause potential hazards. Cut through drywall slowly and check for any unexpected obstacles as you work your way around.
Ceiling fixtures can also be removed once the cabinets and counters are cleared. If you have any recessed lighting or hanging lights, carefully remove them using a screwdriver. Be cautious of wiring when you remove electrical fixtures.
Dispose of Waste Properly
Demolition often generates a large amount of waste, and how you dispose of it is an important step. Be sure to sort through the debris to determine what is recyclable and what needs to be discarded. Construction and demolition waste can be hazardous, so it's important to be mindful of any materials that need special handling. Avoid putting hazardous materials like asbestos or lead-based paint in the regular trash – contact a local professional for safe disposal.
Using a dumpster rental is often the easiest way to manage the disposal of kitchen demolition debris. By properly sorting and disposing of your demolition waste, you can keep your property safe and the environment clean.
Inspect for Structural Issues
After the demolition is complete, take time to inspect the structural integrity of the space. Is there any water damage behind the cabinets? Are there signs of mold or mildew that could affect the new design? You want to make sure that the space is ready for a fresh start, so fix any issues now before you begin rebuilding.
Safety Tips During Kitchen Demolition
When it comes to kitchen demolition, safety should always be your priority. Demolishing a kitchen can be risky, especially when dealing with electrical and plumbing systems, as well as heavy debris. Here are some essential safety tips to follow:
- Wear protective gear: Always use safety goggles, gloves, and a dust mask to protect yourself from debris and dust.
- Shut off utilities: Before beginning demolition, turn off gas, electricity, and water to avoid accidents.
- Be mindful of sharp objects: Debris from countertops, cabinets, and flooring can be sharp. Handle everything with care.
- Work slowly and methodically: Rushing can lead to accidents. Take your time to ensure you’re working safely and correctly.
- Consider hiring a professional: If you’re unsure about tackling a full kitchen demolition yourself, hiring a professional service can ensure that everything is handled safely and efficiently.
Demolishing Your Kitchen with Efficiency and Safety in Mind
When tackling a kitchen demolition, the key to a smooth process is careful planning and execution. Ensure all appliances, plumbing, and electrical connections are safely disconnected before starting. By organizing your work, you can avoid unnecessary complications during the tear-down. Starting with cabinet removal and gradually working your way through flooring and walls ensures a well-paced demolition. Don't forget to clear the space of debris frequently to maintain a clean working environment throughout the project.
As you progress, always wear the necessary safety gear, including gloves, goggles, and a mask. It's essential to be cautious of hidden hazards like mold or outdated wiring that might cause problems during demolition. Depending on the materials being removed, consider renting the right equipment to make the job easier. Staying focused and following a structured approach will allow you to efficiently demolish your kitchen while prioritizing safety, setting the stage for a successful remodel.
Conclusion
Kitchen demolition can be an intense but rewarding part of your kitchen renovation. With careful planning, the right tools, and a step-by-step approach, you can remove old fixtures, cabinets, and flooring without any major setbacks. Always prioritize safety, and take the time to inspect your space before starting your new project. If you’re in need of assistance with your kitchen demolition, or if you simply don’t have the time to do it yourself, consider reaching out to a professional demolition service.
Kick It Junk Removal & Hauling is here to help with all your kitchen demolition needs. Located in Forney, Texas, we offer efficient and safe
junk removal and hauling services, ensuring that your kitchen demolition is done with ease. For more information, or to schedule a service, contact us at 469-866-2395 or email Paul@kickitservices.com.